


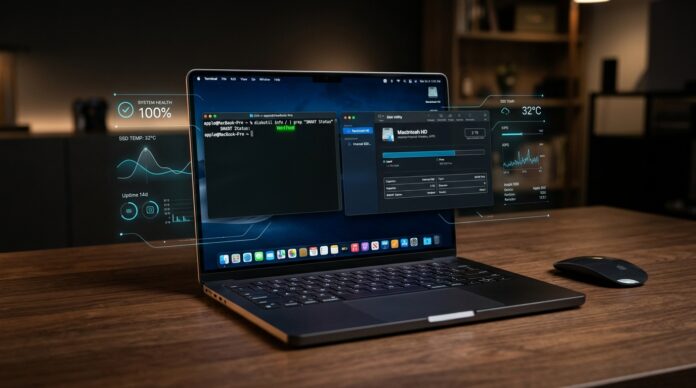
To check SSD health on a MacBook without third-party software, open Terminal and execute diskutil info / | grep "SMART Status" to instantly inspect your storage controller’s hardware health. If the returned output reads SMART Status: Verified, your solid-state drive is functioning within manufacturer electrical and thermal tolerances without reported hardware faults. If the status indicates Failing or Not Verified, the drive has suffered critical sector reallocations or NAND degradation, requiring immediate data backup.
For a complete diagnostic assessment, macOS provides four native assessment layers: the Terminal diskutil utility, the graphical Disk Utility inspector, the hardware-level System Information profiler, and the pre-boot Apple Diagnostics firmware test. Below is the complete, tested technical guide to auditing MacBook SSD health, validating TRIM support, and interpreting hardware failure reference codes natively on both Apple Silicon (M1/M2/M3/M4) and Intel MacBooks.
The 5-Second Native Terminal Command
diskutil info / | grep "SMART Status"
Expected Output: SMART Status: Verified (Healthy, operating normally).
Understanding S.M.A.R.T. on Modern MacBooks
S.M.A.R.T. (Self-Monitoring, Analysis, and Reporting Technology) is an automated monitoring system embedded directly inside solid-state drive controllers. The controller tracks internal diagnostic registers, including write-cycle endurance thresholds, bad NAND blocks, spare block exhaustion, and operational temperatures.
Because modern MacBooks (including all M-series Apple Silicon models) feature soldered NAND chips directly attached to the Apple unified memory and storage architecture, physical drive replacement requires full logic board rework. Periodically verifying S.M.A.R.T. telemetry ensures you catch silent degradation before unrecoverable kernel panics occur.
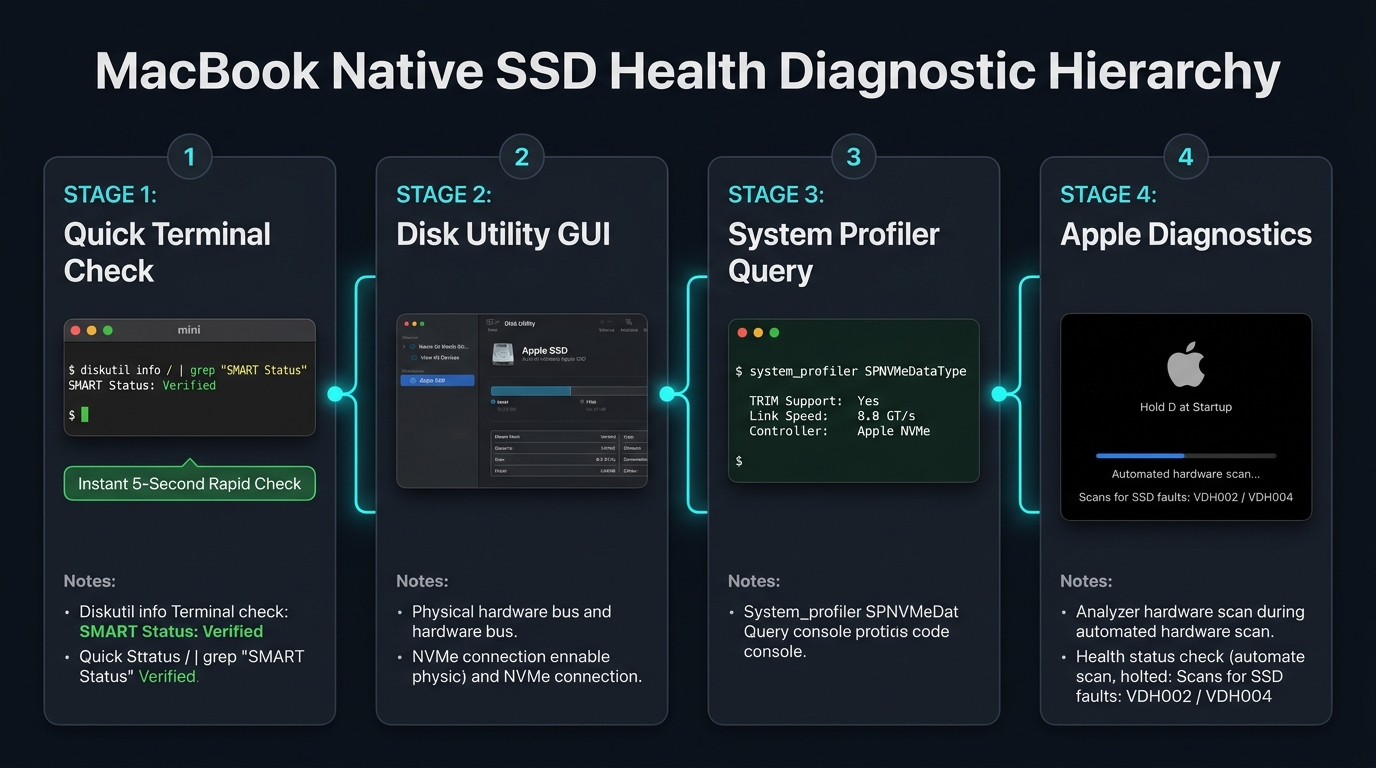
Figure 1: The 4-tier native macOS storage diagnostic hierarchy from Terminal checks to Apple Diagnostics.
Method 1: The Terminal Command-Line Audit (Fastest)
The built-in diskutil utility queries the macOS I/O Kit storage family directly, bypassing graphical user interface abstraction. This is the quickest and most direct method to verify physical drive health.
Step-by-Step Instructions:
- Press Command + Space to launch Spotlight, type
Terminal, and hit Enter. - In the Terminal window, paste the following command and press Return:
diskutil info disk0 | grep -E "(Device / Media Name|SMART Status|Solid State)"
- Review the terminal output:
SMART Status: Verifiedindicates perfect hardware health.Solid State: Yesconfirms macOS correctly identifies the flash media.
If you have multiple partitions or external drives connected, run diskutil list first to locate the exact disk node (e.g., /dev/disk0), then query that identifier specifically.
Method 2: Disk Utility Graphical Inspector
If you prefer a visual interface without running shell commands, macOS Disk Utility includes a built-in hardware inspector. However, you must configure the view mode to inspect the physical hardware rather than logical APFS software volumes.
- Open Disk Utility via Spotlight or from
/Applications/Utilities/Disk Utility.app. - Click the View button in the upper-left toolbar and select Show All Devices (Command + 2). (Crucial: If you select “Macintosh HD” or “Data”, the S.M.A.R.T. status will not be visible).
- In the left-hand sidebar under “Internal”, click on the top-most physical drive entry (typically named
APPLE SSD AP...). - Click the Info icon (the letter “i” in a circle) on the top toolbar.
- Scroll through the property sheet to locate S.M.A.R.T. Status. Confirm that it displays Verified.
- Optionally, click First Aid in the main toolbar and click Run to verify APFS directory structures, file system catalog trees, and snapshot extents.
Method 3: System Information Profiler (NVMe & TRIM Verification)
Checking S.M.A.R.T. verifies physical health, but verifying TRIM status ensures long-term NAND write longevity. TRIM enables the operating system to inform the SSD which data blocks are no longer in use, allowing the internal garbage collection algorithm to manage wear-leveling efficiently.
- Hold down the Option key on your keyboard, click the Apple Menu (&apple;) in the top-left corner, and select System Information….
- In the left hardware column, click on NVMExpress (or Storage).
- Select your internal solid-state drive in the upper pane.
- Examine the device details in the lower pane:
- S.M.A.R.T. Status: Verified.
- TRIM Support: Yes (Must read “Yes” to prevent write degradation).
- Link Speed & Link Width: Displays PCIe bandwidth (e.g., 8.0 GT/s x4).
Alternatively, power users can query this data instantly from Terminal by executing: system_profiler SPNVMeDataType | grep -E "(TRIM|SMART|Model)".
Method 4: Apple Hardware Diagnostics (Pre-Boot Firmware Test)
If your MacBook experiences random freezes, unprompted restarts, or slow disk read times despite a “Verified” S.M.A.R.T. status, run Apple Diagnostics. Apple Diagnostics operates outside the macOS operating system, running automated hardware routines directly on the SoC, power management controller, and flash NAND controller.
On Apple Silicon Macs (M1, M2, M3, M4):
- Shut down your MacBook completely.
- Press and hold the Power button / Touch ID until “Loading startup options” appears on screen.
- Press and hold Command + D on your keyboard. The diagnostics firmware will boot automatically.
On Intel-Based MacBooks:
- Turn on your Mac and immediately press and hold the D key until the diagnostic progress bar appears.
Interpreting Storage Reference Codes:
- ADP000: No issues found. Your SSD and hardware components passed all tests.
- VDH002 / VDH004: Critical issue detected with the internal storage device. Drive failure is imminent; back up data immediately and schedule hardware service.
MacBook Native Diagnostic Methods Compared
| Method | Primary Metric Checked | Execution Time | Best Used For |
|---|---|---|---|
Terminal diskutil |
S.M.A.R.T. Status (Verified/Failing) | < 5 Seconds | Quick daily health verification |
| Disk Utility GUI | S.M.A.R.T. + APFS Container Integrity | 1 to 3 Minutes | Visual check & file system repair |
| System Information | TRIM Support, Link Speed, NVMe Spec | 30 Seconds | Verifying wear-leveling configuration |
| Apple Diagnostics | Hardware fault codes (VDH002/VDH004) | 5 to 10 Minutes | Troubleshooting crashes or boot freezes |
For macOS users optimizing local storage workflows and managing structured files, reviewing our comprehensive walkthrough on exporting Apple Notes documents without formatting loss provides valuable productivity guidance.
Frequently Asked Questions (FAQ)
-
Can I see exact SSD percentage used or Total Bytes Written (TBW) natively?
No, macOS does not display granular TBW or wear percentages natively in the GUI. Built-in macOS utilities only show whether S.M.A.R.T. status is “Verified” or “Failing”. To view exact percentage wear, power-on hours, or terabytes written, power users must query the NVMe log using command-line tools like smartmontools.
-
What does “SMART Status: Not Supported” mean on Mac?
“Not Supported” typically appears when querying an external USB enclosure or a logical volume rather than a physical drive. Many inexpensive external drive enclosures do not pass S.M.A.R.T. commands over USB. On internal drives, ensure you select the top-level physical device in Disk Utility rather than the APFS volume container.
-
What should I do if my Mac SSD reports SMART Status Failing?
Immediately back up all critical files using Time Machine or an external drive. A “Failing” status indicates that the solid-state drive has exhausted its reserve NAND blocks and catastrophic read/write failure is imminent. Once backed up, schedule service with Apple to evaluate logic board replacement.
-
Can a failing MacBook SSD be repaired using First Aid?
No, Disk Utility First Aid repairs logical file system errors, not physical hardware damage. While First Aid can rebuild corrupted APFS catalog trees and partition headers, it cannot repair worn NAND cells or defective controller circuitry.

